Install Neovimλ︎
The Neovim release page includes install steps for specific operating system.
Neovim 0.9 is the minimum version for this configuration and Neovim 0.9.4 is currently being used by Practicalli.
Follow the install Neovim guide for the specific operating system.
Suppoting Toolsλ︎
Neovim uses several external tools for searching for files, search file contents and using the operating system clipbaord.
Install the following tools to support Neovim and AstroNvim
ripgrepfast file contents search (used by telescope)find-fdadvanced search toolxclipx11 clipboard as a provider for Neovim copy/paste (Linux only)luarocksfor LSP servers (AstroNvim)
Treesitter requires a C compiler
nvim-treesitter requires a C compiler , e.g. gcc for Linux or clang for android/termix
The C compiler is used to compile langauge support for treesiter.
AstroNvim requires node.js
AstroNvim uses Mason to install LSP servers, format and lint tools. Many of the LSP servers require node.
Add set clipboard+=unnamedplus to the Neovim configuration to use the Linux clipboard tool
Install Neovimλ︎
Use the GitHub releases for the latest version of Neovim, or use a Package manager for the operating system if the version of Neovim is 0.9.x
Download the Linux AppImage from the Neovim Release page and place the file on the executable path, e.g. $HOME/.local/bin
Make the AppImage executable
Create a symbolic link called nvim to the nvim.appimage file.
nvim command can now be run in a terminal from any directory.
Install from Homebrew or via the Neovim Release page
Homebrew
Neovim Release
Download nvim-macos.tar.gz From the Neovim GitHub release page
Avoid "unknown developer" warning from MacOSX
Make a local apps directory for neovim (and other things like node.js, etc.)
Extract the neovim archive
Create the ~/.local/bin/nvim symbolic link to include Neovim on the OS execution path
echo $PATHto check.local/binis included in the execution the path by the Operating System command line shell
Run nvim (or setup a Neovim configuration first, e.g. AstroNvim)
From the Neovim GitHub release page:
- Install
libintlandgettext(e.g. viabrew install libintl gettext) - Download nvim-macos.tar.gz
- Run
xattr -c ./nvim-macos.tar.gz(to avoid "unknown developer" warning) - Make local apps directory for neovim (and other things like node.js, etc.)
- Extract the neovim download
- Create nvim symbolic link in
~/.local/binto include Neovim on the OS execution path (check.local/binis added to the execution the path by the Operating System command line shell)
Linux version only packaged as AppImage from Neovim 0.9 onward
A .deb file can be created after building Neovim from source.
Neovim Build Prerequisites for each operating system
Debian Packages
Install packages to support building Neovim
Clone the Neovim GitHub repository
Change into the cloned directory and change to the stable release to build version 0.9.0
Build a release
Once the nvim release has been built, create a debian package for use with Ubuntu and Debian systems
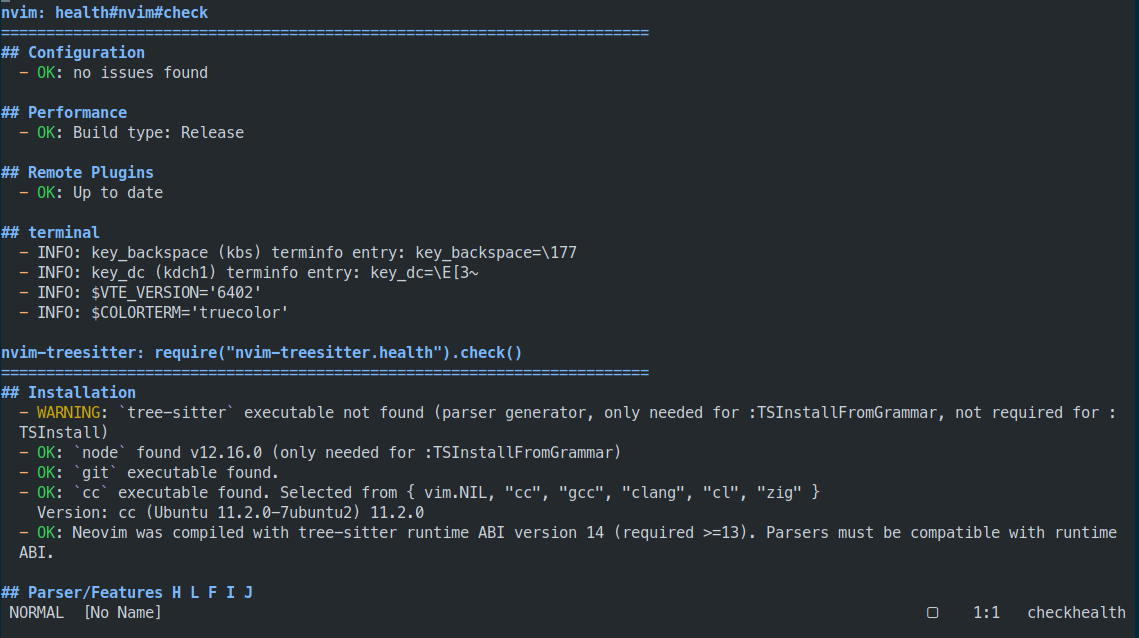
Post Install checksλ︎
Ensure supporting tools and binaries are available in the operating system by running the Neovim Heath Check.
nvim in a terminal to run NeoVim and check the installation is working without error.

:checkhealth to run a check supporting tools are available to NeoVim.
A report is generated and shown in NeoVim
j / k to scroll through the checkhealth report
Review the warnings and install tooling that is required for languages that will be used.
Ignore Provider Warnings
It is safe to ignore language provider warnings.
Language Providers can be disabled in the Neovim configuration to remove the warnings from :checkhealth report. Examples of disabling language provders are in the practicalli/neovim-config-redux configuration, covered in the Neovim Config install step